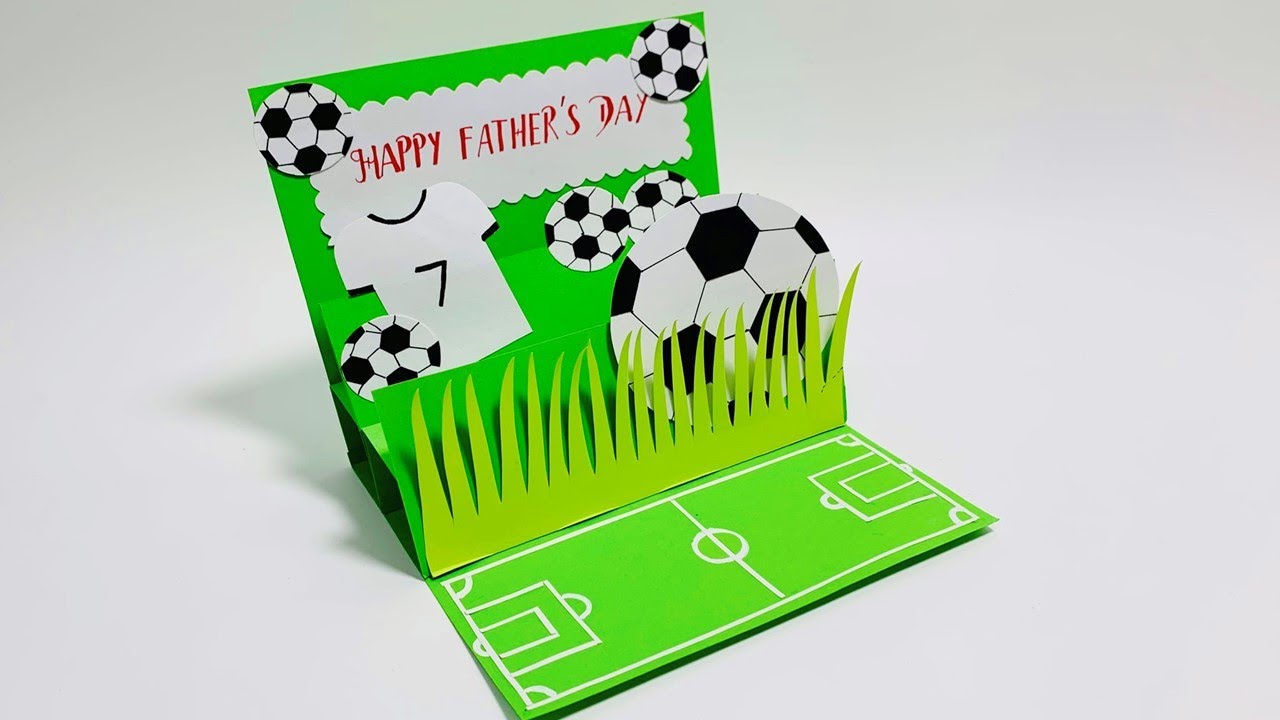
Hey everyone, so I decided to get crafty and make some football cards. It seemed like a cool project, and I figured it would be fun to share how I did it. So, let’s get into it.
First off, I gathered all the stuff I needed. I got some cardstock for the base of the cards. I picked up different colors because, well, why not? Variety is the spice of life, right? I also made sure to grab my cutting tools, a good old ruler, some scissors, and a cutting mat. I didn’t want to mess up my table.
Next, I started with the design. I thought about what I wanted these cards to look like. Did I want just a simple photo and some text, or did I want to go all out with graphics and stuff? I sketched a few ideas on paper, just rough outlines, nothing fancy. It helped me visualize what I was aiming for. Once I had a design I liked, I went ahead and measured out the panels for the cards. I wanted them to be interactive, so I decided to go with four panels. I used my ruler and marked the dimensions on the cardstock and then carefully cut them out with scissors.
With the panels ready, I started working on the content. I found some awesome football pictures online. You know, action shots, player portraits, the whole nine yards. I made sure they were good quality images because nobody wants a blurry football card. I printed them out, making sure they fit nicely on the panels. Then came the fun part – adding text.
I played around with different fonts and colors, trying to match the vibe of each card. I added the player names, their positions, team logos, and some stats. I wanted the cards to look legit, you know? After printing the text, I carefully glued the pictures and text onto the panels. I used a glue stick because it’s less messy than liquid glue. I pressed them down firmly to make sure they stuck well.
Once everything was glued and dried, I assembled the cards. I folded the panels in a way that they could open and close smoothly. It took a bit of fiddling, but I got there. It was pretty satisfying to see the cards taking shape.
Here’s a quick rundown of what I did:
- Gather materials: cardstock, ruler, scissors, cutting mat.
- Design the cards: sketch layouts, decide on style.
- Prepare the panels: measure and cut cardstock.
- Create content: find images, add text, print everything.
- Assemble: glue images and text to panels, fold and put together.
And that’s pretty much it! It was a fun little project, and I ended up with some pretty cool custom football cards. They’re not perfect, but hey, I made them myself, and that’s what counts. If you’re thinking about doing something similar, just dive in. It’s all about having fun and being creative. Plus, you get to show off your handmade stuff, which is always a bonus. Happy crafting!


